In recent years, automotive enthusiasts and car owners alike have been raving about the benefits of ceramic coatings. This revolutionary protective solution has gained popularity for its ability to enhance a vehicle's appearance and provide long-lasting protection. However, one common question that often arises is, "How much does a ceramic coating cost?" In this blog, we will delve into the factors influencing the cost of ceramic coatings and help you understand what to expect when considering this investment for your vehicle.
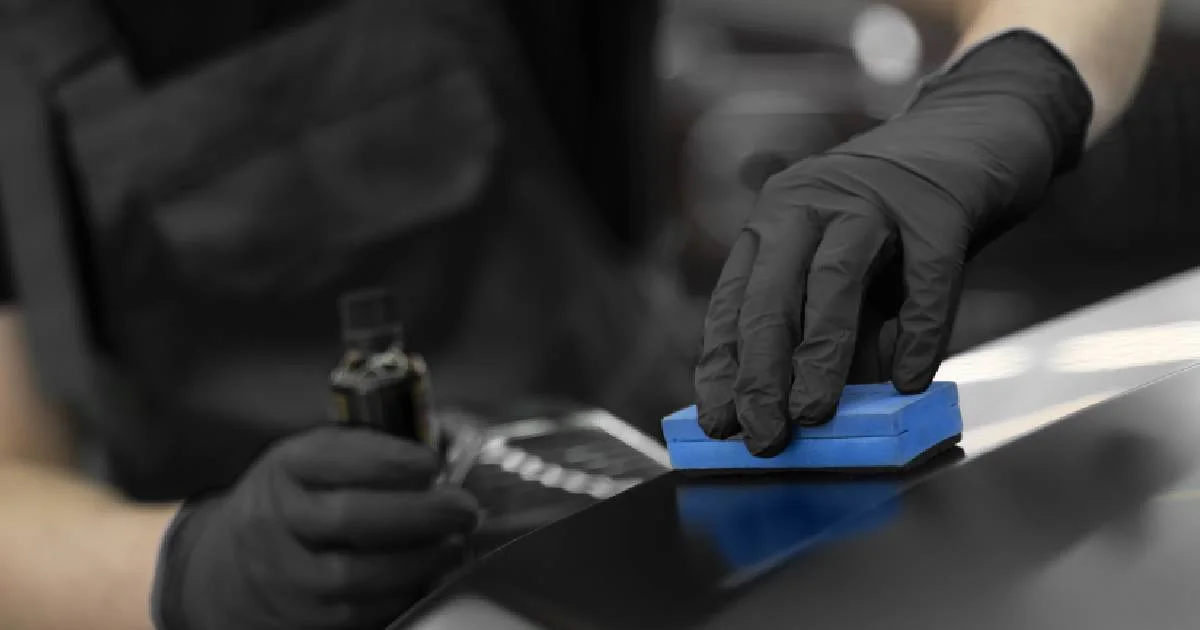
Before we dive into the cost, let's briefly understand what ceramic coating is. Ceramic coating is a liquid polymer applied to the exterior surfaces of a vehicle. Once cured, it forms a protective layer that shields the paint from various environmental contaminants such as dirt, bird droppings, UV rays, and more. The result is a glossy finish and enhanced durability that can last for several years.
In conclusion, the cost of ceramic coating varies based on several factors, including the type of coating, brand reputation, application method, vehicle size, and paint condition. While it may seem like a significant investment upfront, many car owners find that the long-term benefits, including enhanced aesthetics and protection, outweigh the initial cost.
Before making a decision, it's crucial to research different ceramic coating options, read reviews, and consider your budget. Whether you choose a professional application or a DIY kit, investing in ceramic coating can ultimately contribute to the longevity and resale value of your vehicle, making it a worthwhile consideration for automotive enthusiasts and those looking to protect their investment.
Vinyl wrapping has become an increasingly popular method for transforming the appearance of vehicles, furniture, and other surfaces. In Hamilton, the trend has caught on, with enthusiasts and businesses alike embracing the versatility and durability of vinyl wraps. Whether you're looking to add a personal touch to your car or give your business vehicle a professional look, mastering the art of vinyl wrapping is essential. In this comprehensive guide, we'll explore the ins and outs of vinyl wrap in Hamilton, providing you with tips and tricks for achieving a stunning finish.
Before diving into the application process, it's crucial to understand the basics of vinyl wrap. Vinyl wraps are thin, adhesive-backed films that adhere to surfaces, creating a protective layer that can be customized with various colors, textures, and designs. They offer a cost-effective alternative to traditional paint jobs, allowing for easy removal and updates.
Selecting the right vinyl is the foundation of a successful wrap. Consider the surface you're wrapping and the desired finish. For vehicles in Hamilton's diverse weather conditions, opt for high-quality, weather-resistant vinyl to ensure longevity. Matte, gloss, satin, and metallic finishes are popular choices, each offering a unique aesthetic.
Proper surface preparation is key to a flawless vinyl wrap. Ensure that the surface is clean, smooth, and free from any dirt, grease, or wax. Use a mild detergent and water solution to clean the surface thoroughly, and follow up with isopropyl alcohol to remove any remaining residue. Repair any existing damage, such as dents or scratches, before starting the wrapping process.
Gather the necessary tools before beginning the vinyl wrap process. Essential tools include a squeegee, heat gun, knife or cutting tool and measuring tape. Investing in high-quality tools will make the application smoother and result in a professional-looking finish.
The key to a successful vinyl wrap lies in the application technique. Start by carefully aligning the vinyl with the target surface, ensuring a slight overhang on all edges. Use a squeegee to remove air bubbles and smooth out the vinyl, working from the center outward. A heat gun can be used to stretch the vinyl around curves and contours for a seamless finish.
Once the vinyl is applied, trim the excess material with precision. A sharp cutting tool is crucial for achieving clean edges and corners. Pay attention to details, such as door handles and curves, to ensure a professional look. Seal the edges with a heat gun for added durability and longevity.
To preserve the quality and appearance of your vinyl wrap in Hamilton's varying weather conditions, follow a routine maintenance schedule. Wash your wrapped surface regularly with a mild detergent, avoiding abrasive cleaners that could damage the finish. Additionally, park your wrapped vehicle in shaded areas whenever possible to minimize exposure to harsh sunlight.
Vinyl wrapping in Hamilton opens up a world of creative possibilities for vehicle customization and branding. By understanding the nuances of the process and incorporating the tips and tricks outlined in this guide, you can achieve a stunning finish that not only turns heads but also stands the test of time. Whether you're a DIY enthusiast or seeking professional services, mastering the art of vinyl wrap will undoubtedly elevate your style and make a lasting impression on the streets of Hamilton.
When it comes to enhancing the comfort and functionality of your home, window tinting is a solution that often goes unnoticed. In New Zealand, where climate variations are common, the benefits of home window tinting extend far beyond aesthetic appeal. In this article, we'll explore how home window tinting can significantly reduce your energy bills and lead to long-term cost savings, making it a smart investment for homeowners across the country.
New Zealand experiences a range of weather conditions throughout the year, from scorching summers to chilly winters. During these extremes, the energy used to regulate indoor temperatures can skyrocket. This is where window tinting comes into play.
1. Heat Reduction: One of the primary benefits of window tinting is its ability to reduce heat gain. Tinted windows block a significant portion of the sun's heat and harmful UV rays from entering your home. As a result, your indoor spaces remain cooler during hot summer months, reducing the need for air conditioning.
2. Insulation: Window tinting also provides insulation benefits, helping to maintain a consistent indoor temperature. In winter, it helps to keep warmth inside, reducing the need for excessive heating.
Now, let's delve into how these energy-efficient qualities translate into tangible cost savings for homeowners in New Zealand.
1. Lower Energy Bills: By reducing heat gain during the summer and heat loss during the winter, window tinting significantly reduces your reliance on heating and cooling systems. As a result, you'll see a noticeable drop in your energy bills year-round.
2. Extended Appliance Lifespan: Reduced reliance on air conditioners and heaters not only saves you money on electricity but also extends the lifespan of these appliances. They don't have to work as hard, which means fewer repairs and replacements.
3. Furniture and Flooring Preservation: Window tinting also blocks harmful UV rays that can cause fading and damage to your furniture, flooring, and décor. This means you won't have to spend as much on replacing or refurbishing these items.
4. Enhanced Home Value: A home with energy-efficient features like window tinting can command a higher resale value in the New
Zealand real estate market. Potential buyers are often willing to pay more for a home with reduced energy costs.
In New Zealand, where energy efficiency and sustainability are becoming increasingly important, home window tinting stands out as a practical investment for homeowners. By reducing energy bills, extending the lifespan of appliances, preserving your interior, and enhancing your home's value, window tinting offers numerous long-term cost-saving benefits.
So, if you're looking to make your New Zealand home more energy-efficient and cost-effective, consider investing in professional window tinting services. Not only will you enjoy a more comfortable living space, but you'll also contribute to a greener and more sustainable future while saving money in the process.
As homeowners seek innovative ways to improve comfort, energy efficiency, and privacy, home window tinting has become a popular solution. But what exactly is home window tinting, and how much does it cost? In this blog, we’ll dive into the benefits, process, and pricing of this transformative home upgrade.
Home window tinting involves applying a thin, durable film to the interior or exterior of your windows. The film is designed to reduce heat, glare, and UV rays while offering privacy. While window tinting is commonly associated with cars, it has gained popularity for residential applications due to its ability to enhance energy efficiency and protect home interiors.
The cost of home window tinting depends on several factors, including the size and number of windows, the type of film you choose, and the complexity of the installation. Here’s a general breakdown:
Given the benefits of energy savings, enhanced privacy, and UV protection, home window tinting can be a smart investment for homeowners. In regions with extreme heat or cold, the energy savings alone can offset the initial cost over time. Additionally, the long-term benefits of protecting your furniture and reducing the risk of break-ins make it a valuable home improvement option.
Home window tinting is a cost-effective way to improve energy efficiency, privacy, and security in your home. While prices can vary depending on your specific needs, the long-term benefits make it a worthwhile investment for many homeowners. Whether you opt for professional installation or a DIY approach, window tinting offers a range of solutions to enhance your living space.
If you’re considering tinting your home’s windows, get quotes from local professionals to determine the best options for your budget and needs.